 Last year while serving on the TOS Homeschool Crew, we reviewed a product called Graphics Toolbox by Great Software Tools.
 It is a product that I really enjoyed! About a month ago, I joined the Great Software Tools team, as Homeschool Sales Specialist.
In that capacity, what I am going to be doing, is posting on my blog each Tuesday - Graphics Toolbox Tuesday - a project that my family and I have completed.
My desire is to show you, all the wonderful things you are able to achieve with Graphics Toolbox and how those projects can impact your family and your homeschool.
What we created this week is a Thank You note. We created a personalized Thank You note to send to our Pastor's son who spoke at my daughters graduation.
Here is the original photo.
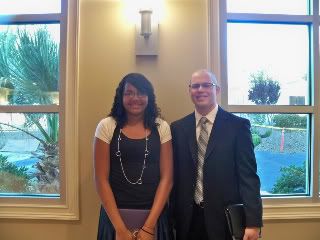
So, what I did first was create a frame, and crop the picture. Once the picture was placed I wanted to color in the border. I decided I wanted to have two colors. I actually was able to pick out colors from within the photograph to create the border. Both color's come from Larry Chappell's tie.

In the next step, I was able to layer in fancy lines. These fancy lines are cataloged in Graphics Toolbox. You can choose the color, and like in this example, I layered in 2 different lines to achieve my desired affect. Once I was happy with the fancy lines, it was time to add in the text. What you see below is the finished graphic.

Now, it is time for printing. With Graphics Toolbox you have the ability to print the image in a manner that you will not have all that extra paper folded into the card. Like with many of the other card maker programs.
When printed, it comes out looking like this..

Now, if you were printing several cards, you could also choose to print two, one on top of the other, and then simply cut between the two.
Since I only needed one, I printed only one, and then cut away the excess paper.

And then you simply fold, and fill in the inside of the card....

This entire project took me about 20- 25 minutes. Now, it only took me that long, because there are still features that I am learning. I imagine that my next thank you card will only take me about 10 minutes or less to make.
Tune in next week to see what else you can make with Graphics Toolbox!
For more information about Graphics Toolbox, you can email me at jennifer@greatsoftwaretools.com
Just added.........
We just whipped up this up for a friend of my daughter....
This is the computer image....

And here is the finished product....

This one did not take nearly as long... and I created an irregular frame, and pulled the music notes out of another picture.
Looks great! I bet Bro. Chappell will be quite pleased to receive this card!
ReplyDeleteThanks Heidi!! My daughter was really excited to send such a personalized card!!
ReplyDelete